이번에는 비즈니스 로직을 담당하는 Service, 사용자가 보는 화면인 View, Model 영역과 View를 연결해주는 Controller 영역을 개발을 진행한다.
프론트엔드 팀원이 있어서 View 파트는 진행하지 않아도 되지만, 테스트를 진행할 때 좀 더 편하게 진행하기 위해 View 파트도 진행하기로 했다.
1. Service 처리하기
이전에 Mapper 영역의 처리를 완료했기 때문에 서비스 영역부터 진행한다.
'plming.board.service' 패키지 안에 PostService 인터페이스를 생성하고, 아래 메서드를 작성한다.
package plming.board.service;

import plming.board.domain.PostDTO;

import java.util.List;

public interface PostService {

    public boolean registerPost(PostDTO post);

    public PostDTO getPostDetail(Long id);

    public boolean deletePost(Long id);

    public List<PostDTO> getPostList();
}
다음으로 같은 패키지 안에 PostService 인터페이스 구현 클래스인 PostServiceImpl 클래스를 생성하고, 더보기 부분의 코드를 작성한다.
package plming.board.service;

import org.springframework.beans.factory.annotation.Autowired;
import org.springframework.stereotype.Service;
import plming.board.domain.PostDTO;
import plming.board.mapper.PostMapper;

import java.util.Collections;
import java.util.List;

@Service
public class PostServiceImpl implements PostService {

    @Autowired
    private PostMapper postMapper;

    @Override
    public boolean registerPost(PostDTO post) {
        int queryResult = 0;

        if (post.getId() == null) {
            queryResult = postMapper.insertPost(post);
        }
        else {
            queryResult = postMapper.updatePost(post);
        }

        return (queryResult == 1) ? true : false;
    }

    @Override
    public PostDTO getPostDetail(Long id) {
        return postMapper.selectPostDetail(id);
    }

    @Override
    public boolean deletePost(Long id) {
        int queryResult = 0;
        PostDTO post = postMapper.selectPostDetail(id);

        if (post != null && "N".contains(post.getDeleteYn())) {
            queryResult = postMapper.deletePost(id);
        }

        return (queryResult == 1) ? true : false;
    }

    @Override
    public List<PostDTO> getPostList() {
        List<PostDTO> postList = Collections.emptyList();
        int postTotalCount = postMapper.selectPostTotalCount();

        if (postTotalCount > 0) {
            postList = postMapper.selectPostList();
        }

        return postList;
    }
}
코드를 살펴보면
| 메서드 및 기타 | 설명 |
| @Service | PostMapper 인터페이스의 @Mapper와 유사하다. 해당 클래스가 비지니스 로직을 담당하는 서비스 클래스임을 의미한다. |
| implements | PostService 인터페이스에 정의한 메서드를 구현하기 위해 PostService를 상속받는다. 인터페이스와 구현 클래스를 구분하여 처리하는 이유는 여기 참고 |
| postMapper | @Autowired를 이용해 PostMapper 인터페이스 Bean을 주입한다. |
| registerPost | 이전 글에서 언급했듯이, 게시글 번호(id)의 존재 유무를 기준으로 INSERT 또는 UPDATE를 실행한다. 1. quertResult 변수에 insertPost 또는 updatePost 메서드의 실행 결과를 저장한다. 각 메서드에서 호출한 쿼리가 정상적으로 실행되면, 쿼리를 실행한 횟수, 즉 1이 저장된다. 2. if-else 문에서 post의 id가 null이면, MySQL의 AUTO_INCREMENT 속성에 의해 PK(id)가 자동으로 증가되어 게시글을 생성하고, id가 포함되어 있으면 게시글을 수정한다. 3. return 문에서는 쿼리의 실행 결과를 기준으로 true 또는 false를 반환한다. |
| getPostDetail | 하나의 게시글을 조회하는 selectPostDetail 메서드의 결괏값을 반환한다. (게시글 조회 수를 증가시키는 로직이 추가될 예정) |
| deletePost | 특정 게시글을 조회하고, 사용 중인 상태의 게시글인 경우에만 게시글을 삭제한다. 없는 게시글이거나, delete_yn 컬럼의 상태 값이 'Y'인 경우에는 삭제가 실행되지 않는다. 쿼리의 실행 결과를 기준으로 true 또는 false를 반환한다. |
| getPostList | 삭제되지 않는 전체 게시글을 조회한다. 1. postList: NPE를 방지하기 위해 Collections 클래스의 emptyList 메서드를 통해 비어있는 리스트 선언 2. postTotalCount: 사용 중인 전체 게시글 수를 카운팅 한 결과를 저장 3. if문: 사용 중인 전체 게시글이 1개 이상이면 boardList에 seletPostList 메서드의 결괏값을 반환 |
1.1. Service를 테스트하기 전에..
테스트를 편하게 진행하기 위해 DB의 데이터를 한 번에 삭제해주는 메서드를 추가한다.
각각의 파일에 아래의 코드를 추가해주면 된다.
- PostMapper.java
void clearStore();
- PostMapper.xml
<delete id="clearStore">
    DELETE FROM post
</delete>
- MapperTest.java
@Test
public void clearStoreTest() {
    postMapper.clearStore();
    System.out.println("모든 데이터가 삭제 되었습니다.");
}
- 테스트 결과


1.2. Service 테스트하기
'src/test/java' 디렉터리의 'plming.board' 패키지 내에 service 패키지를 생성한 후 ServiceTest 파일을 생성한다.
가장 먼저 registerPost 메서드를 테스트할 것이다.
ServiceTest 파일에 코드를 작성하기 전 MySQL에서 post 테이블의 id를 auto implement로 지정했기 때문에 registerPost를 통해 insert 된 post의 id 값을 getId를 사용해 가져오기 위해서는 postMapper.xml 파일의 insert 부분을 아래와 같이 수정해야 한다. (userGenerateKeys="true" keyProperty="id" 추가)
    <insert id="insertPost" parameterType="PostDTO" useGeneratedKeys="true" keyProperty="id">
        INSERT INTO post (<include refid="postColumns" />)
        VALUES (
                #{id}, #{user}, #{title}, #{category}, #{status}, 0, #{period},
                #{content}, 0, NOW(), NULL, 'N'
        )
</insert>- useGenerateKeys 관련 설명
-
더보기useGeneratedKeys 속성을 사용할 때는 keyColumn과 keyProperty 속성이 함께 쓰인다.
useGeneratedKeys = "true" (defulat 값은 false), keyColumn = [PK 컬럼명], ketProperty = [매핑할 변수명]로 사용하면 INSERT 한 id 값을 "id"로 바로 가져올 수 있다.
출처: https://m.blog.naver.com/l1523/221706040458
ServiceTest 파일에 아래 더보기 코드를 추가한다.
package plming.board.service;

import org.junit.jupiter.api.AfterEach;
import org.junit.jupiter.api.BeforeEach;
import org.junit.jupiter.api.DisplayName;
import org.junit.jupiter.api.Test;
import org.springframework.beans.factory.annotation.Autowired;
import org.springframework.boot.test.context.SpringBootTest;
import plming.board.domain.PostDTO;
import plming.board.mapper.PostMapper;

import java.util.Collections;
import java.util.List;

import static org.assertj.core.api.Assertions.assertThat;
import static org.junit.jupiter.api.Assertions.*;

@SpringBootTest
public class ServiceTest {

    @Autowired
    PostServiceImpl postService;

    @Autowired
    private PostMapper postMapper;

    private PostDTO post = new PostDTO();

    @BeforeEach
    void beforeEach() {
        post.setTitle("1번 게시글 제목");
        post.setContent("1번 게시글 제목");
        post.setUser("사용자1");
        post.setCategory("study");
        post.setPeriod("1개월");
        post.setStatus("모집 중");
    }

    @AfterEach
    void afterEach() {
        postMapper.clearStore();
    }

    @Test
    @DisplayName("게시글 등록 테스트")
    void registerPostTest() {
        // given
        // when
        boolean result = postService.registerPost(post);

        // then
        assertThat(result).isTrue();
    }
}
테스트를 실행해보면 잘 실행되는 것을 확인할 수 있다.

테스트 코드를 살펴보면
| 메서드 및 애노테이션 | 설명 |
| @BeforeEach | @Test가 붙은 메서드의 실행이 시작되기 전에 @BeforeEach가 붙은 메서드가 실행된다. 테스트 메서드에서 공통으로 처리해야 할 로직을 넣어주면 코드 반복을 없앨 수 있다. 여기서는 하나의 테스트 메서드가 끝날 때마다 테이블 데이터를 초기화시켜줄 것이므로, 테스트 메서드가 실행되기 전에 하나의 post를 넣어주기 위해 postDTO를 생성하고 값을 넣어주는 로직을 작성했다. |
| @AfterEach | @Test가 붙은 메서드의 실행이 끝날 때마다 @AfterEach가 붙은 메서드를 실행시켜준다. 하나의 테스트 메서드 안에서 SQL에 값을 넣어주었는데 이 값이 그대로 유지되면 다음 테스트 실행 시 오류가 발생할 수 있으므로, 항상 테스트 메서드가 실행된 후 afterEach 메서드를 호출해 post 테이블의 모든 데이터를 지워준다. |
| @DisplayName | @DisplayName 속성으로 String을 넣어주면 Run 환경에서 메서드 이름이 원래 이름 대신 지정한 String으로 보여진다. |
| assertThat(값).isTrue() | assertThat은 org.assertj에서 지원하는 클래스 isTrue 메서드는 값이 true일 경우 pass하고, false일 경우 오류 메시지를 보여준다. |
| assertEquals(값 1, 값 2) | assertEquals는 org.junit에서 지원하는 클래스 값 1과 값 2를 비교해 (값 1 == 값 2)일 경우 pass하고, 아닐 경우 오류 메시지를 보여준다. |
| registerTest | registerPost 메서드가 제대로 작동하는지 테스트하는 메서드 새로운 PostDTO를 생성한 뒤 registerPost를 통해 SQL에 값을 넣어주고 결괏값을 반환받아 result에 넣어준다. 그 다음 result가 true인지 확인한다. 새로운 postCp에 조금 전에 저장한 post의 id 값으로 정보를 가져와 저장하고, postCp의 user 값과 post의 user 값이 같은지 확인한다. |
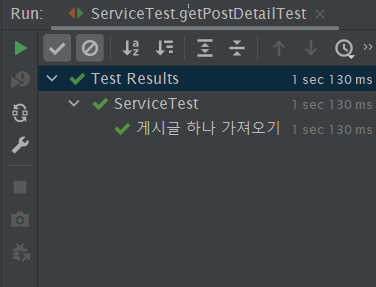
두 번째로 getPostDetail 메서드를 테스트할 것이다. ServiceTest 코드에 아래 메서드를 추가한다.
@Test
@DisplayName("게시글 하나 가져오기")
void getPostDetailTest() {
    // given
    postService.registerPost(post);

    // when
    PostDTO postCp = postService.getPostDetail(post.getId());

    // then
    assertEquals(postCp.getTitle(), post.getTitle());
}
테스트를 실행시켜보면 에러 없이 잘 동작하는 것을 확인할 수 있다.
코드를 살펴보면
| 메서드 | 설명 |
| getPostDetailTest | registerPost를 통해 값을 INSERT한 뒤, getPostDetail를 통해 post의 id에 해당하는 게시글 정보를 가져와 postCp 객체에 넣어준다. 그 다음 assertEquals 메서드를 통해 post의 제목과 postCp의 제목을 가져와 비교한다. |
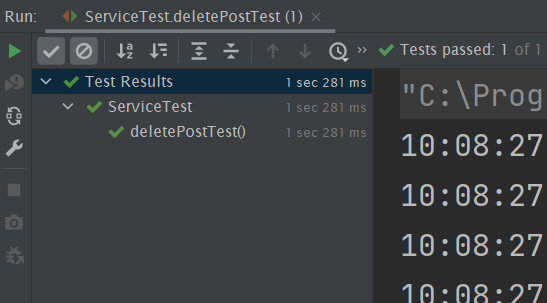
세 번째로 deletePost 메서드를 테스트할 것이다. ServiceTest 클래스에 아래 메서드를 추가한다.
@Test
void deletePostTest() {
    // given
    postService.registerPost(post);

    // when
    boolean result = postService.deletePost(post.getId());

    // then
    assertThat(result).isTrue();
    assertEquals(postMapper.selectPostTotalCount(), 0);
}
테스트를 실행시켜보면 에러 없이 잘 동작하는 것을 확인할 수 있다.
코드를 살펴보면
| 메서드 | 설명 |
| getPostDetailTest | registerPost를 통해 값을 INSERT한 뒤, deletePost를 통해 post의 id에 해당하는 정보를 삭제한다. (실제로 삭제하는 것은 아니고 delete_yn 컬럼의 값을 'Y'로 변경하는 로직을 실행한다.) deletePost의 결과값을 result로 받아와 assertThat를 사용해 true가 맞는지 확인한다. 제대로 삭제가 되었다면 postMapper의 selectPostTotalCount의 값이 0이어야 하므로 assertEquals를 사용해 값이 0이 맞는지 확인한다. (selectPostTotalCount는 delete_yn이 'N'인 컬럼의 개수를 확인하는 메서드이다.) |
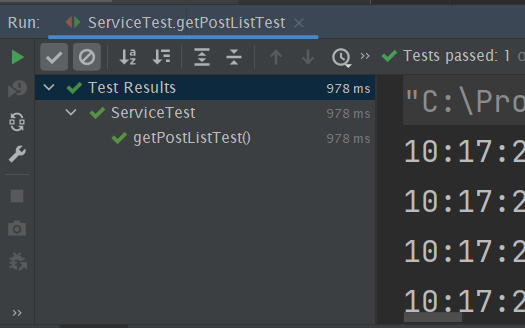
마지막으로 getPostListTest 메서드를 테스트할 것이다. ServiceTest 클래스에 아래 메서드를 추가한다.
@Test
void getPostListTest() {
    // given
    PostDTO post2 = new PostDTO();
    post2.setTitle("2번 게시글 제목");
    post2.setContent("2번 게시글 제목");
    post2.setUser("사용자2");
    post2.setCategory("study");
    post2.setPeriod("2개월");
    post2.setStatus("모집 중");

    postService.registerPost(post);
    postService.registerPost(post2);

    // when
    List<PostDTO> postList = Collections.emptyList();
    postList = postService.getPostList();

    // then
    assertEquals(postList.size(), 2);
}
테스트를 실행시켜보면
코드를 살펴보면
| 메서드 | 설명 |
| getPostListTest | 게시글 리스트를 가져오는 메서드를 테스트하는 것이므로 게시글이 하나인 경우에는 테스트 데이터가 부족하다. 따라서 post 인스턴스를 하나 더 생성한 후 registerPost 메서드를 사용해 beforeEach 메서드에서 만들어진 post 인스턴스와 같이 DB에 등록한다. getPostList의 결과를 담을 List 변수 postList를 생성하고, getPostList 메서드를 호출해 postList에 결과값을 담아준다. post 인스턴스 두 개를 INSERT했으므로 postList의 길이가 2가 되어야 테스트에 성공한 것이다. assertEquals를 사용해 postList의 길이와 2를 비교한다. |
2. 컨트롤러 처리하기
사용자가 보는 화면(User Interface)을 담당하는 컨트롤러를 처리해볼 것이다.
'plming.board.controller' 패키지에 BoardController 클래스를 생성하고, 아래의 코드를 추가한다.
package plming.board.controller;

import org.springframework.beans.factory.annotation.Autowired;
import org.springframework.stereotype.Controller;
import org.springframework.ui.Model;
import org.springframework.web.bind.annotation.GetMapping;
import plming.board.service.PostService;

@Controller
public class PostController {

    @Autowired
    private PostService postService;

    @GetMapping("/posts/write")
    public String postWrite(Model model) {
        return "posts/write";
    }
}
코드를 살펴보면
| 구성 요소 | 설명 |
| @Controller | 해당 클래스가 사용자의 요청과 응답을 처리하는 (UI를 담당하는) 컨트롤러 클래스임을 의민한다. |
| @GetMapping | @RequestMapping(value = "posts/write", method = RequestMethod.GET) 과 같은 역할 |
| 리턴 타입 | 컨트롤러 메서드의 리턴 타입은 void, String, ModelAndView, Map 등 여러 가지 타입을 지정할 수 있다. 대표적으로 String과 ModelAndView는 사용자에게 보여줄 화면(HTML 경로)을 리턴문에 지정해서 처리한다. 예전에는 ModelAndView가 주로 사용되었지만, 최근에는 String을 많이 선호한다고 한다. 리턴 문에 지정된 HTML 경로의 끝에는 접미사(suffix)로 확장자(".html")가 자동으로 연결되기 때문에 확장자를 생략할 수 있다. |
| Model | 메서드의 파라미터로 지정된 Model 인터페이스는 데이터를 뷰로 전달하는데 사용된다. |
2.1. 화면 처리하기
컨트롤러의 처리가 마무리되면, 메서드의 리턴 타입으로 지정된 경로에 화면(HTML)을 생성해야 한다.
"src/main/resources" 디렉터리의 templates 폴더에 posts 폴더를 추가하고, posts 폴더에 write.html을 추가해 아래 코드를 작성한다.
<!DOCTYPE html>
<html>
<head>
    <meta charset="UTF-8">
    <title>The page is a write page</title>
</head>
<body>
<h2>Welcome Spring Boot!</h2>
</body>
</html>
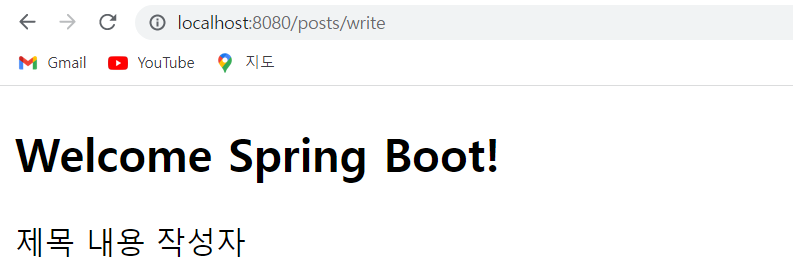
2.2. 화면 확인하기
BoardApplication.java를 실행시켜 조금 전에 생성한 화면을 확인해본다.
BoardApplication.java가 정상적으로 실행되면 인터넷 창에서 주소에 "localhost:8080/posts.write"를 입력한 뒤 화면을 확인한다.

"Welcome Spring Boot"라는 문구가 뜨면 성공한 것이다.
2.3. Model 인터페이스
다음은 컨트롤러에서 화면(HTML)으로 데이터를 전달하는 데 사용되는 Model 인터페이스이다.
postWrite 메서드를 아래 코드로 변경한다.
@GetMapping("/posts/write")
public String postWrite(Model model) {

    String title = "제목";
    String content = "내용";
    String writer = "작성자";

    model.addAttribute("title", title);
    model.addAttribute("content", content);
    model.addAttribute("writer", writer);

    return "posts/write";
}| 메서드 | 설명 |
| addAttribute 메서드 | 해당 메서드를 이용해 화면(HTML)로 데이터를 전달할 수 있다. 메서드의 인자로 이름(String name), 값(Object value)을 전달한다. 일반적으로 이름과 값을 동일하게 지정한다. HTML에서는 Thymeleaf 템플릿을 사용하면 ${ } 표현식을 이용해 전달받은 데이터에 접근할 수 있다. |
이제 Thymeleaf를 이용해 전달받은 데이터를 화면에 출력해볼 것이다. write.html을 아래 코드로 변경한다.
<!DOCTYPE html>
<html lang="ko" xmlns:th="http://www.thymeleaf.org">
    <head>
        <meta charset="UTF-8">
        <title>The page is a write page</title>
    </head>
    <body>
        <h2>Welcome Spring Boot!</h2>
        <span th:text="${title}">여기는 제목입니다.</span>
        <span th:text="${content}">여기는 내용입니다.</span>
        <span th:text="${writer}">여기는 작성자입니다.</span>
    </body>
</html>
다시 애플리케이션을 실행하고 글쓰기 페이지로 접근하면, 컨트롤러에서 전달받은 데이터의 값이 출력되는 것을 확인할 수 있다.
2.4. 부트 스트랩 적용
나중에 프론트엔드 파트에서 만든 화면으로 대체될 것이지만, 테스트 화면을 보기 좋게 하기 위해 부트 스트랩을 적용했다.
이 부분은 참고 블로그의 "4. 부트스트랩(Bootstrap) 적용하기" 부분을 따라 하면 된다.
단, 폴더 구조가 다르므로 폴더 구조는 아래를 참고하면 된다.
- templates/board 폴더 -> templates/posts 폴더
2.5. 게시글 등록 화면 처리
PostController의 postWrite 메서드를 아래 코드로 변경한다.
@GetMapping("/posts/write")
public String postWrite(@RequestParam(value = "id", required = false) Long id, Model model) {
    if (id == null) {
        model.addAttribute("post", new PostDTO());
    } else {
        PostDTO post = postService.getPostDetail(id);
        if (post == null) {
            return "redirect: /posts/list";
        }
        model.addAttribute("post", post);
    }

    return "posts/write";
}
코드를 살펴보면
| @RequestParam | View에서 전달받은 파라미터를 처리하는데 사용된다. 게시글 리스트 페이지에서 게시글 등록 페이지로 이동하면 게시글 id는 null로 전송된다. 하지만, 게시글 상세 페이지에서 수정하기 버튼을 클릭하면 controller로 게시글 id가 파라미터로 전송되고, controller는 전달받은 게시글 id를 getPostDetail 메서드의 인자로 전달한다. 새로운 게시글을 등록하는 경우에는 게시글 id가 필요하지 않기 때문에 'required' 속성을 false로 지정한다. (required 속성의 default 값은 true이다.) 이 값을 false로 지정하지 않으면 id가 파라미터로 전송되지 않을 때 오류가 발생한다. |
| 전체 로직 | if-else 문은 게시글 id를 전달받은 경우와 전달받지 않은 경우로 나뉜다. 각각의 조건문을 보면 addAttribute 메서드를 이용해 PostDTO 객체를 "post"라는 이름으로 View로 전달한다. 게시글 id가 전송되지 않은 경우에는 비어있는 객체를 전달하고, 게시글 id가 전송된 경우에는 getPostDetail 메서드를 실행한 결과(게시글 정보를 포함하고 있는 객체)를 전달한다. 만약 getPostDetail 메서드의 실행 결과가 null이라면, 게시글 리스트 페이지로 리다이렉트한다. |
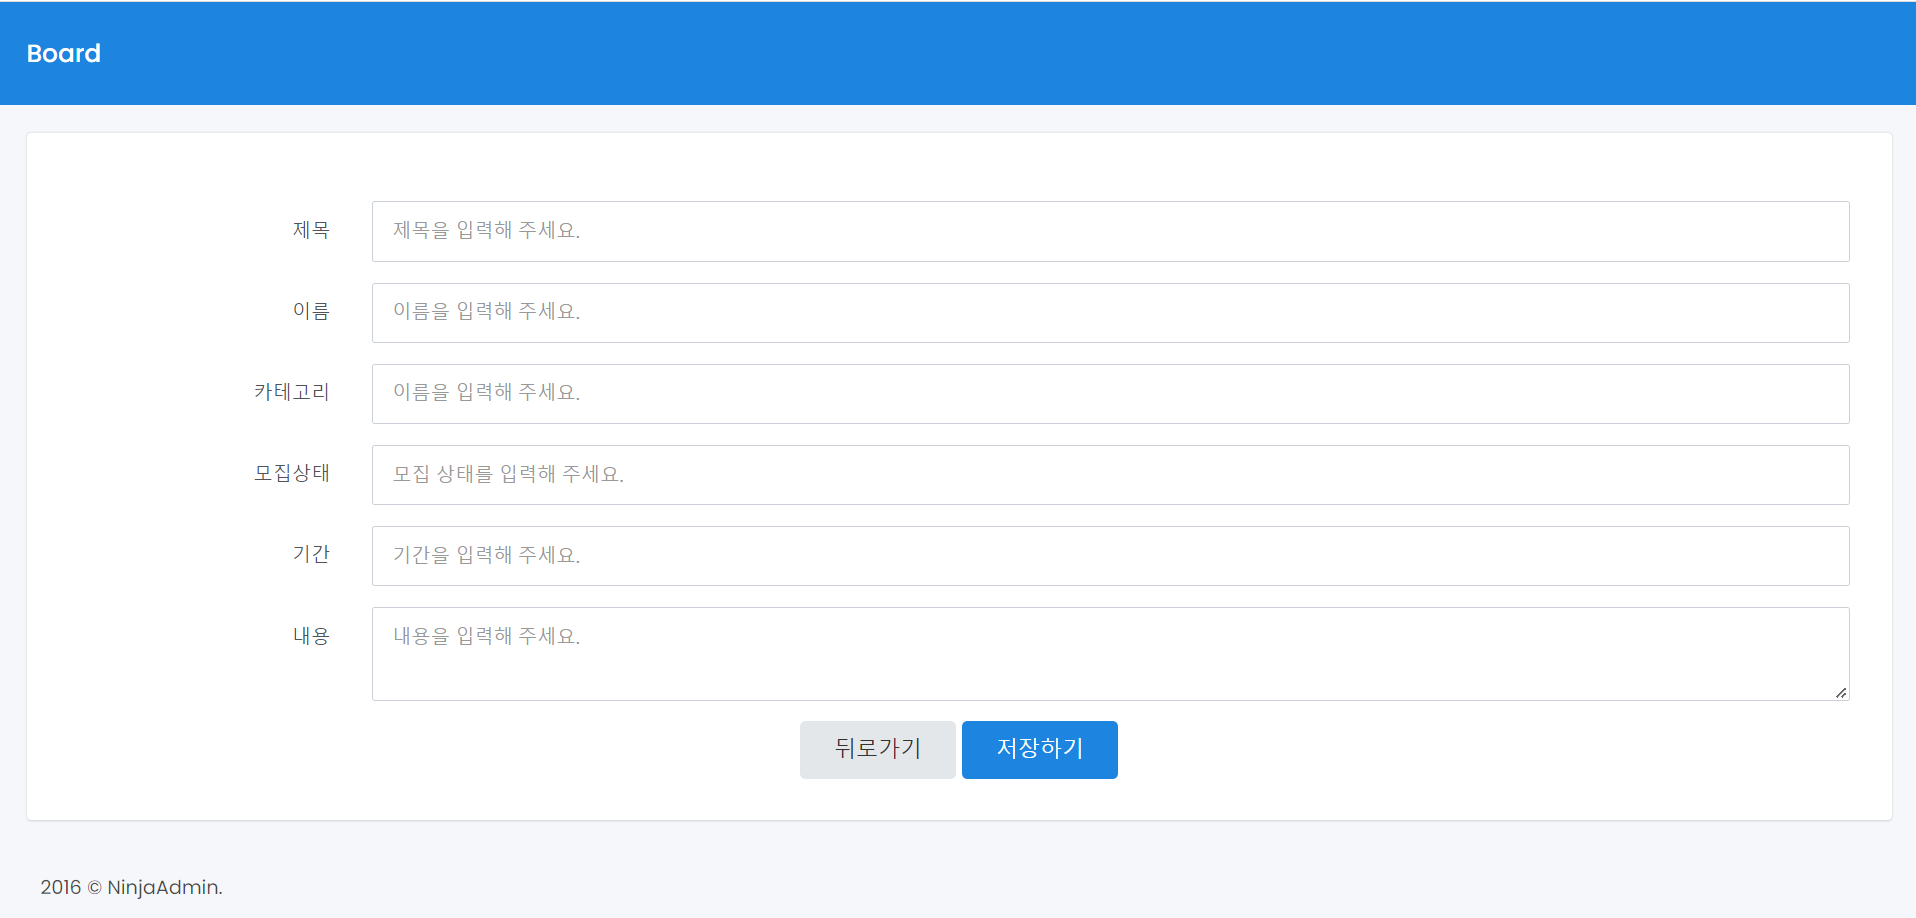
다음으로 글쓰기 페이지에 글을 작성할 수 있는 영역 즉, 실제 Content 영역을 포함시켜 볼 것이다. write.html을 더보기와 같이 변경한다. 자세한 코드 설명은 참고 블로그 (부트 스트랩 적용 부분에 있는 참고 블로그와 같은 블로그)에 나와있다.
<!DOCTYPE html>
<html lang="ko" xmlns:th="http://www.thymeleaf.org" xmlns:layout="http://www.ultraq.net.nz/thymeleaf/layout" layout:decorate="posts/layout/basic">
    <th:block layout:fragment="title">
        <title>This page is a write page</title>
    </th:block>

    <th:block layout:fragment="content">
        <div class="card-content">
            <form class="form-horizontal" th:action="@{/posts/register}" th:object="${post}" method="post" onsubmit="return registerPost(this)">
                <!--/* update의 경우 서버로 전달할 게시글 번호 (PK) */-->
                <input type="hidden" th:if="*{id != null and id > 0}" th:field="*{id}" />

                <div class="form-group">
                    <label for="title" class="col-sm-2 control-label">제목</label>
                    <div class="col-sm-10">
                        <input id="title" type="text" th:field="*{title}" class="form-control" placeholder="제목을 입력해 주세요." />
                    </div>
                </div>

                <div class="form-group">
                    <label for="user" class="col-sm-2 control-label">이름</label>
                    <div class="col-sm-10">
                        <input id="user" type="text" th:field="*{user}" class="form-control" placeholder="이름을 입력해 주세요." />
                    </div>
                </div>

                <div class="form-group">
                    <label for="category" class="col-sm-2 control-label">카테고리</label>
                    <div class="col-sm-10">
                        <input id="category" type="text" th:field="*{category}" class="form-control" placeholder="이름을 입력해 주세요." />
                    </div>
                </div>

                <div class="form-group">
                    <label for="status" class="col-sm-2 control-label">모집상태</label>
                    <div class="col-sm-10">
                        <input id="status" type="text" th:field="*{status}" class="form-control" placeholder="모집 상태를 입력해 주세요." />
                    </div>
                </div>

                <div class="form-group">
                    <label for="period" class="col-sm-2 control-label">기간</label>
                    <div class="col-sm-10">
                        <input id="period" type="text" th:field="*{period}" class="form-control" placeholder="기간을 입력해 주세요." />
                    </div>
                </div>

                <div class="form-group">
                    <label for="content" class="col-sm-2 control-label">내용</label>
                    <div class="col-sm-10">
                        <textarea id="content" th:field="*{content}" class="form-control" placeholder="내용을 입력해 주세요."></textarea>
                    </div>
                </div>

                <div class="btn_wrap text-center">
                    <a th:href="@{/posts/list}" class="btn btn-default waves-effect waves-light">뒤로가기</a>
                    <button type="submit" class="btn btn-primary waves-effect waves-light">저장하기</button>
                </div>
            </form>
        </div>
        <!-- /.card-content -->
    </th:block>

    <th:block layout:fragment="script">
        <script th:inline="javascript">
            /*<![CDATA[*/

            function registerPost(form) {

                var result = (
                    isValid(form.title, "제목", null, null)
                    && isValid(form.writer, "이름", null, null)
                    && isValid(form.content, "내용", null, null)
                );

                if ( result == false ) {
                    return false;
                }
            }
            /*[- end of function -]*/

            /*]]>*/
        </script>
    </th:block>
</html>
마지막으로 PostController에 폼 태그의 th:action 속성에 지정한 게시글 등록을 처리하는 메서드(registerPost)를 작성한다.
@PostMapping("/posts/register")
public String registerPost(final PostDTO post) {
    try {
        boolean isRegistered = postService.registerPost(post);
        if (isRegistered == false) {
            // 게시글 등록에 실패했다는 메시지 전달
        }
    } catch (DataAccessException e) {
        // 데이터베이스 처리 과정에 문제가 발생했다는 메시지 전달
    } catch (Exception e) {
        // 시스템에 문제가 생겼다는 메시지 전달
    }

    return "redirect: /posts/list";
}| 파라미터 | 설명 |
| post | 사용자 입력 필드의 "name" 속성 값을 통해 폼 데이터를 controller 메서드의 파라미터로 전송한다. PostDTO의 멤버 변수명과 사용자 입력 필드의 "name" 속성 값이 동일하면 params의 각 멤버 변수에 "name" 속성 값을 통해 전달된 value가 매핑된다. |
| try/catch | 예외를 처리하는 로직이다. try 문 안의 로직의 실행에 문제가 생겼을 때 catch 영역에서 printStackTrace 메서드를 이용해 문제를 추적할 수 있지만, System.out.println, printStackTrace와 같은 코드가 많아지만 시스템에 영향을 준다고 한다. 개발이 마무리될 때 콘솔에 로그를 출력하는 부분을 제거하는 것이 좋을 것이다. 추가적으로 예외는 상황에 맞게 처리해야 한다. 앞으로는 예외가 발생하면 사용자에게 문제점을 메시지로 전달하고, 게시글 리스트 페이지로 redirect하는 방법을 사용할 예정이다. |
이제 서버를 실행시켜 게시글 등록을 테스트해볼 것이다.
서버를 실행시켜 '/posts/write' 페이지에 들어가 보면 화면이 잘 나오는 것을 확인할 수 있다.
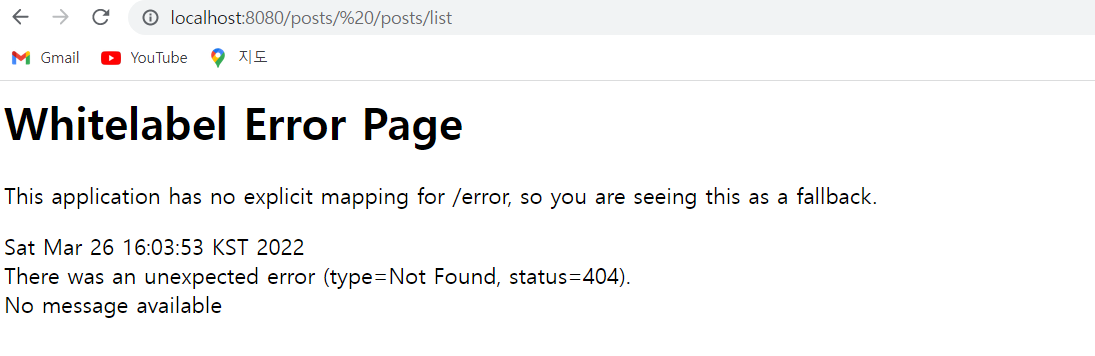
내용을 입력하고, 저장하기 버튼을 클릭하면 아직 게시글 리스트 페이지와 매핑된 메서드가 없기 때문에 404 에러가 발생한다. MySQL Workbench를 실행해 방금 입력한 데이터가 정상적으로 INSERT 되었는지만 확인하면 된다.
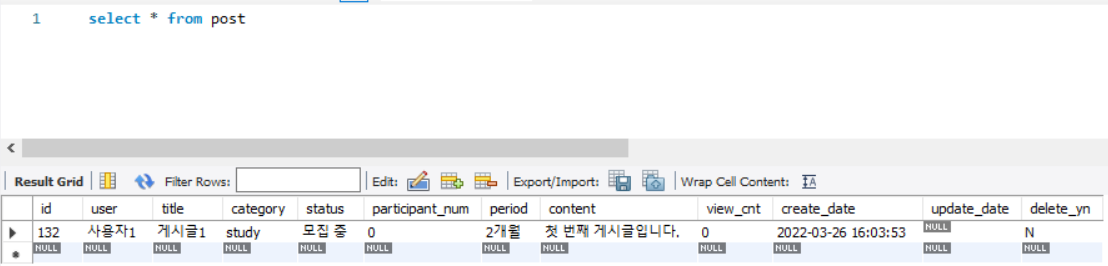
Workbench에 데이터가 잘 등록되어 있다면 게시글 등록 구현은 끝났다.
이 프로젝트는 아래 블로그를 참고해서 만들었습니다.
https://congsong.tistory.com/16?category=749196
'Spring Boot Project > Plming' 카테고리의 다른 글
| [Plming] 게시판에 JPA 적용하기 (0) | 2022.03.29 |
|---|---|
| [Plming] 게시글 등록 기능에 REST API 적용하기 (0) | 2022.03.28 |
| [Plming] 게시판 CRUD 처리하기 (0) | 2022.03.25 |
| [Plming] 개발 환경 세팅하기 (0) | 2022.03.24 |
| [Plming] 프로젝트 기획 (0) | 2022.03.24 |


댓글